How to Replace an Auto Armature
Replacing an auto armature can seem like a daunting task, but with the right tools and some patience, it's possible to get the job done. In this article, a step-by-step guide on how to replace an auto armature, having the right tools, how to avoid common mistakes, and how to properly install the new auto armature has been provided, so you can get your vehicle back on the road quickly and safely.
Table of Contents
Open the Hood and Disconnect the Battery Unscrew the Old Armature Clean Off Any Rust and Debris From the Connection Points Screw In the New Armature Reconnect the Battery Wrapping Up
Open the Hood and Disconnect the Battery
Before you can begin replacing your auto armature, the first step is to open the hood of your vehicle and disconnect the battery. To do this, locate the two terminals on the top of the battery. Using a wrench, unscrew each of the terminal nuts and pull off the cables. Make sure you store them away from any metal so they don't come into contact with one another or cause any sparks. You can then remove the negative cable first and then the positive cable. Once they are disconnected, you are ready to start replacing your armature.
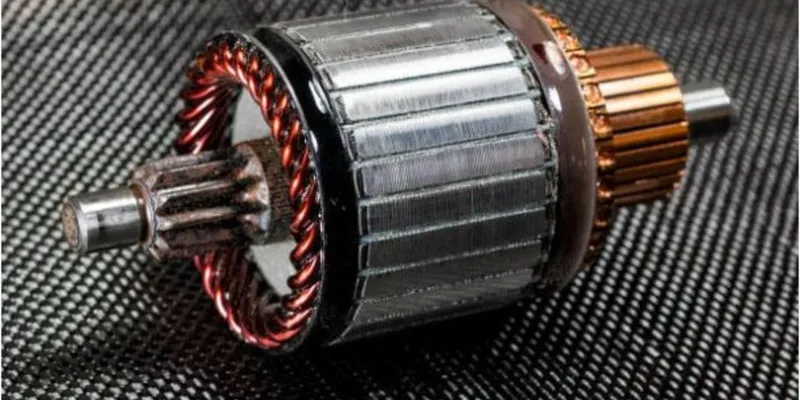
Unscrew the Old Armature
To start, you'll need to locate and unscrew the old armature. Depending on the make and model of your vehicle, it may be located in a variety of places. The most common locations are near the starter motor or underneath the distributor. You'll need to disconnect the battery and ensure that the car is not powered before removing the armature. A wire should also be detached from the armature if there is one. The next step is to unscrew the old armature once everything is disconnected. To loosen the screws and bolts, take a screwdriver and gently turn them until they're loose. Be sure to keep track of any nuts, bolts, or screws so that you can easily replace them later. You can then remove the armature from its mounting point and place it aside.
Clean Off Any Rust and Debris From the Connection Points
Once the old armature has been removed, it’s important to clean off any rust and debris from the connection points. This will ensure that the new armature is securely installed and won’t have any problems with operation. To clean off the rust and debris, use a wire brush and some sandpaper to scrub away any buildup. If there is a lot of corrosion on the connection points, use a rust remover to clean them up before installing the new armature. Once the connection points have been cleaned, you’re ready to install the new armature.
Screw In the New Armature
Once you’ve disconnected the battery, unscrewed the old armature, and cleaned off any rust and debris from the connection points, it’s time to install the new armature. First, make sure the new armature is securely fastened to the mounting bracket and aligned properly. You may need to adjust the mounting bracket slightly to get the correct alignment. Once the armature is in place, use your wrench or ratchet set to secure the mounting bolts. Make sure the bolts are tightened securely so that the armature does not move around. If you're using a ratchet set, use the lowest setting possible for your safety. Now that the armature is securely fastened to the mounting bracket, you can connect the wiring. Make sure all wires are securely connected to their respective terminals. If your vehicle has a plug-in connector for the armature, you may need to use a flathead screwdriver to remove and reinstall it. Finally, double-check all connections to make sure they are secure. Once you’ve verified that everything is connected properly, reconnect the battery and start your vehicle. If all went well, you should be back on the road in no time!
Reconnect the Battery
The last step in replacing your auto armature is reconnecting the battery. Before reconnecting, make sure you have double-checked that all connections are secure and the new armature is in place correctly. Once you are sure, you can begin to reconnect the battery. You should first put on safety gloves to protect yourself. Next, connect the negative cable, which is black to the negative terminal. The positive terminal should be tightened with a socket wrench. Next, connect the positive cable, which is red to the positive terminal and tighten it using a socket wrench. One more time, make sure the connection points are tightly secured. When finished, replace the hood and start up the car to make sure everything works properly. If all goes well, then you have successfully replaced your auto armature!
Wrapping Up
Replacing an auto armature is a straightforward process that does not require a lot of specialized tools or knowledge. It's important to make sure to properly clean off any rust or debris from the connection points before screwing in the new armature. After completing these steps, you can rest assured that your car's performance will be back to normal. Be sure to follow all safety protocols when working on any part of your vehicle.