How to Export High-Quality Videos Using CapCut Desktop Video Editor

Exporting high-quality videos with CapCut desktop video editor is like adding a perfect final touch to a masterpiece – all your creative choices, transitions, effects, and edits come to life in polished, vibrant detail. However, to achieve that professional look, you need to know about export settings and tweak a few basics. Whether you are making content for social media, a unique project, or working on something bigger, learning how to export quality videos, is crucial if you want to show others your vision in detail. Here are the strategies you can employ to ensure you achieve the best export quality with very bright and clear frames.
Step 1: Finalise Your Edits
Before exporting, ensure all edits are finalized. This includes:
- Cutting out scenes, and clips.
- Remove background from video to avoid abruptness
- Using effects or filters on top to make the images cooler
- Adjusting the volume of pre-recorded material, overlaid narration, and other effects to blend them cohesively
- Applying transitions to create a professional look between scenes
- Once you have made all your corrections, you are prepared to go through the export settings.
Step 2: Open Export Settings
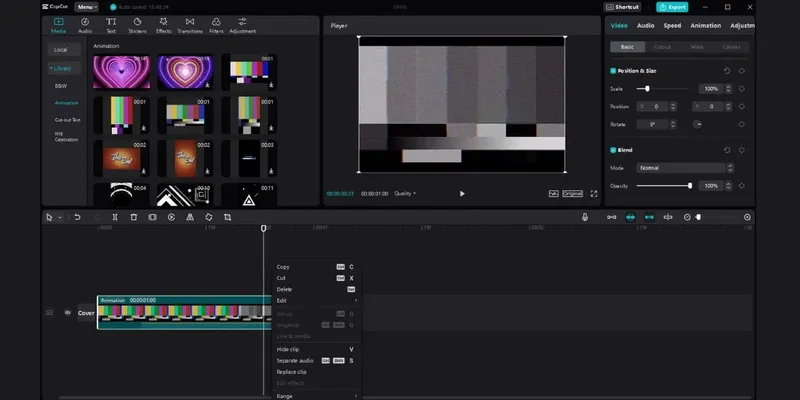
- As for the CapCut video editor for pc, you can find the export settings in the upper right corner with a button called “Export”. This leads to a drop-down list of various choices you can make concerning the quality and format of the exported video.
Step 3: Select the Right Resolution
Resolution is the number of pixels in each picture or frame, commonly represented by width x height. Increased resolutions provide sharper images, especially on big displays because they have finer details. In CapCut, there are multiple resolution options available to suit your project's needs:
- 1080p (Full HD) is suitable for high-quality social media videos or personal use.
- 1440p (2K) This option is great for content displayed on larger screens.
- 2160p (4K) high resolution for professional projects and videos that will be broadcast on large screens.
Step 4: Choose the Right Frame Rate
Frame rate, often referred to as frames per second (fps), is a key setting in video production that influences the smoothness and clarity of motion in the final output. At higher frame rates, the movement appears smoother, and this feature can be useful for shooting action scenes. CapCut provides several options:
24 fps – typically used in filmmaking.
30 fps – Suitable for social networks and web videos.
60 fps – Suitable for sports, games, or any content that demands high frame rates.
If you are shooting a slow-motion effect, you should choose a frame rate of 30 fps for smoothness while not draining too much data. For instance, if you are creating a video of sports highlights to be uploaded on the web, then exporting the file at 60 fps will give more fluidity in capturing moments and this is more engaging to customers.
Step 5: Set Bitrate
Bitrate defines how much information is transmitted per second in terms of a video. An increase in the bit rate leads to better sound quality, but in the same way, the increase in the size of the file. CapCut typically offers options like:
- 4,000 kbps – Good mainly for web videos, although their quality is decent if they are of considerable size.
- 8,000 kbps – Well suited for the creation of content for social networks.
- 12,000 kbps or higher – This option is mostly practical for professional videos
For example, if your target resolution is 1080p for a vlog to be shared on Instagram, a bit rate of 8000 kbps will suffice for better quality without consuming too much storage. But for 4K video, it is recommended to set the bitrate of 12,000kbps or higher to let the viewers watch the video at the highest quality available.
Step 6: Audio Settings
The sound quality is just as important as video quality, particularly in videos that contain voiceovers or music. CapCuttext-to-speech AI feature lets you adjust audio settings during export:
Audio bitrate: 128 kbps is fine for background music or other uses when sound isn’t a major component, but 320 kbps will give you better quality for background music or minimal audio.
Choosing 320 kbps will guarantee that all the dialogue in the exported video or the music track is clear and has a depth that will be evident to any viewer who is using speakers or headphones.
Step 7: Preview Before Export
It is always a good idea to take a look at the export settings in CapCut before proceeding. Turning on the preview window will help you see how adjustments switch the result of your work. This assists in guaranteeing that resolution, bitrate, as well as frame rate all make positive contributions to the video.
Step 8: Export and Save
Once you are satisfied with the settings, click “Export” to start the process. Exporting may take several minutes to an hour, depending on the length, quality, and speed of your computer. After the high-quality video has been created, it will be saved in the folder of your choice.
Conclusion
Understanding how to export high-quality videos using the CapCut Desktop video editor doesn’t have to be tough. By fine-tuning the resolution, frames per second, bit rate, and audio configuration for each video, every project of yours will shine. If you follow these simple guidelines, then you are ready to make interesting and professional-looking videos.